Seligor's Castle, fun for all the children of the world. Creepy Tales
CREEPY TALES
Creepy Tales
THE GHOST STORY
by Alois Mikulka
dottido@hotmail.co.uk will reach me from wherever you are.
Once
there was a ghost who spent his time sitting on a wooden box in the
attic, sadly gazing into space., patiently waiting to scare anyone who
came in. But nobody did. So the ghost just sat there, dozing, wrapped in a white sheet.
Then one day a chimney sweep appeared and saw the ghost sleeping.
"Hello!" the sweep shouted.
The ghost woke up with a start, his chin trembling with fright. The chimney sweep laughed so muh he nearly split his sides.
"Imagine me scaring a ghost" he said. When he calmed down he gave the ghost a sweet, and as the little ghost sucked it, his fears melted away. The chimney sweep swept all the chimneys and went away to have some lunch.
The ghost soon became bored again, all alone in the attic, so he decided to go for a stroll. He went into the streets and people stared at him.
"Who on earth could that creature be, with those skinny legs and a white sheet"? they asked each other. But the ghost just gave them all a lop-sided grin and went into a hairdresser's shop.
Now the hairdresser was expecting a client, so he said to the ghost,
"Do sit down, Madam." But ghosts have no hair, and when he took off his sheet the hairdresser discovered a bald head. So shrugging his shoulders the hairdresser sprayed the whole of his head with Eau de Toilette and polished it as shiny as a shoe. The ghost looked terribly nice as he strode through the streets smelling like a rosebed.
He stopped suddenly when he came to a notice which read. "Cross over to the other side please." - for the pavement had been freshly tarmacadamed . Unfortunately the ghost couldn't read so he walked on leaving deep footmarks in the sticky tarmac.
He also didn't notice the watchman on duty nearby , with a whistle in his hand and a deep frown on his forehead. When he saw the ghost's footprints, he frowned even more and blew his whistle loudly. The ghost simply smiled at him innocently and walked on. The angry watchman ran after the disobedient ghost. Unfortunately he ran so fast that his braces snapped. This was all to the ghost's delight, for he liked nothing better than a came of "Catch me if you can" so he ran even faster enjoying himself enormousely. The watchman kept blowing his whistle and clutching his pants as he ran after the ghost as fast as he could.
They came to a fence, which the ghost climbed over with great ease. The fence surrounded an enormous tower, which was so high that the top disappeared into the clouds. The watchmman clambered over the fence, puffing madly and still blowing his whistle. Next thing the ghost had tucked his sheet into his pants and began to climb the tower.
The watchman's eyes followed him up. his eyes and mouth were both open so wide in amazement that he swallowed his whistle. The whistle ended up in the watchman's stomach. It was very dark in there and the whistle was so afraid that it went on whistling.
By now the watchman was really furious, for the whistle was brand new, he glanced up at the ghost once more and spitting on his hands he began to follow the ghost up the tower.
The column seemed never ending and the ghost became more and more frightened as he climbed on and on. The watchman climbed on and on too, because he was still ver cross about his whistle. They both climbed higher and higher until the ghost reached the sky.
He was very surprised to find that the sky was made of blue glass. He trod on it carefully and was even more surprised to find it would take his weight. The watchman was much heavier than the ghost and the moment he put his weight upon the glass, he smashed right through it. He fell down, down and landed with such a big bump that his cap was knocked right over his eyes and his new whistle flew out of his mouth. he put his cap back in its proper place and blew the whistle just to make sure it was still working.
He sadly went back to the tarmac, shook hs head when he saw the damage the ghost had caused and immediately began to write out a report to explain what had happened.
Meanwhile the ghost was having a wonderful time, whizzing along the sky of blue glass, whereever his feet trod, they left black footprints. Then suddenly he saw a magnificent white star. The ghost went upto it and saw that it was made entirely of icing sugar. The ghost had a sweet tooth, but he didn't have any money to buy sweets, so he was delighted. After all the star was free. He tucked into it quite happily, but as ghosts are quite small and stars are rather big, I think it is going to take him an awful long time before he finishes eating the star and comes back to earth. I also think he will be a very fat ghost.
Do you think this really happened children? You don't!
Well, didn't you notice only the other day, how the white clouds were cleaning up the black footprints in the blue glassy sky. And when they had finished that job they were so dirty they had to wash themselves thoroughly.
That was when the people below had to put on their raincoats and put up their umbrellas and looked up to the grey, rainy sky.
Perhaps when the ghost has stopped eating - hopefully it will stop raining.
This story was translated into English by Vera Gissing - I hope you enjoyed it.
CREEPY TALES FROM WALT DISNEY
WHAT REAL CARTOONS ARE MADE OF
CREEPY TALES AND STORIES.
There have been many witches written about, some good some bad.
Witches
fill books and films. Anyone remember Samantha Stevens as the witch in “Bewitched,” why when she and Darren had their baby Tabitha, she was
even portrayed as a witch. Not to mention her mother "Andora" and "Aunt
Clara" who always got spells wrong, of course we have "Glenda the Good
Witch" in “The Wizard of Oz” and also The other compass witches, East
and West, both pretty mean. Who could forget the wicked witch squealing ‘I’ll get you my pretty and your
little dog Toto too,’ with her scary green face, flying on her
broomstick, with a legion of flying monkeys at her command? Does she
have historical roots or is she purely imagination? Then there is the TV witches the Halliwell sisters fighting evil on “Charmed,” and what about Disney and Hans Christian Anderson, the Brothers Grimm.
Without witches casting their evil spells none of these books would ever have made it into the Disney Land
Films. There is Snow White's step mother, she could work magic, for it
seems if you can cast a spell, you are a witch. The we mustn't forget
the most evil Witch King of Angmar, from Lord of the Rings. Why don't
you try and count up all the witches you have read about and maybe
leave me a comment. There are Blog entries for "seligorscastle and
diddilydeedotsdreamland" everywhere, even on the side of this frame.
Hm,m
I think we had better get back to the fairy stories, much better
pretend I think. So here is another little story it's about a witch
called Winnie. Do you know that Diddily has five witches hanging around
the walls next to her computer. I will see if I can find a picture of
her later sitting at the PC. Shush, don't tell her otherwise she might
put a spell on me. Right let's get on with the story of Winnie and Wanda: But first a story about Pam Mai Ravie a young girl who had a lesson to learn. Enjoy !!!!
This
wee story was written by my friend Liz, a co member of the "Pin Board
Writing Club." Unfortunately she has a full time job now, which no
longer leaves her time to join us. Though when ever she has a spare
Monday Morning she is always there at the Daniel Owen Centre in Mold
5 A DAY- An Alternative Menu Written by my good friend and fellow writer, Liz Proctor
Pam Mai Ravie whinced at the meal her mother had put in front of her for dinner and sighed. "Mum,
you know I'm trying not to eat this sort of food anymore. I really
want to eat a healthier diet and you keep sabotaging it by putting all
of this on my plate every night." She prodded the various pieces of meat with her fork .
"We
should all give it a go, not just me. I know it's much more difficult
for you and Dad to adjust after all these years, but you'd both benefit
you know as well as Michael and Ruby if only ........" "That's enough Pam!" her mother Eva cut in. "You
and
your new-fangled ideas. I'm fed up of it.Your father and I have been
eating this food for years and years, do we look unhealthy ? Your brother and sister eat what we put before
them,and we dn't need you to start fillinf their heads with your stupid ideas Eva slammed the fridge door shut, and as she did so her voice grew increasingly louder. "You'd
think I was serving up convenience foods from the supermarket, or using a
microwave all the time. Every one of you have a choice of meats each
night, as well gravy and vegetables. I cook everything fresh before you leave for your night school, so tell me young lady, what is your problem ? " Pam opened her mouth to speak, but Eva still hadn't finished. "I
know what it is, it's
those new blessed girlfriends you've got yourself mixed up with at this night
school. The're
influencing you with their fancy ideas, fruit and veg! you will end up
end up anorexic. Do you want to look like these so called
super models, as thin as a rake with not an ounce of meat on any of
them, do you ?" she was wagging her finger in front of Pam's face. "Which
incidently brings me right back to you refusing to eat your dinner again tonight. "Do you know how much it is costing your father to let you go to this bloody night school, you do realise
don't you that he is having to
work extra shifts to fund you through it, and he has to provide for
Michael and Ruby and their needs as well, so you better get rid of
these fancy idea's, I am not,
having all his hard work going to waste."
She pushed the plate back in front of Pam. "I
am not throwing away decent food and that's that. Your dad will be
getting up shortly and he will be having this very same meal before
getting ready to go to work . "She paused long enoughto
take a breath,"and just for the record lady, Michael and Ruby
thoroughly enjoyed their dinner tonight, and you haven't
forgotten that it is Michael's time to go with your Dad on his rounds tonight?."
Startled Pam looked at her mother she shook her head in dismay. She was
just about to speak when her father walked into the room. "As good as any alarm clock is your mothers voice," he said, giving her a sleepy smile, as he sat down at the table. Eva rolled her eyes and glared at Pam as she apologised to her husband. "I
am so sorry my love but it's this girl going on one of her missions,
saying anything to avoid eating the meals I'm preparing for her," She
threw another dirty look at her daughter, a deep frown spread across her
brow.
"I wouldn't mind Anton but she has never gone hungry. she has always been given the best wholesome food all her life."
She put the cup down on the table a little too
hard and it spilt. "Dash it Anton, it just gets me so frustrated, you
go out night after night, work so hard, and I really don't
want her unsettling the younger ones." Eva reached over and placed her
husbands meal in front of him, he smiled at her then began to cut up
the mixed grill of liver, kidneys and steak. He took a mouthful and
began to eat. Pam began to play with her food again.
Her father finished his food and put his knife and fork down. "Ok Pam what's this all about then?" She felt decidedly uncomfortable and kept her eyes on the table. "Well
Dad, I really do think Mum is taking this to far. I have been
trying to tell you both for ages that I prefer eating fruit and veg to
meat. In fact you could say I'm sort of a vegetarian already,"
She swallowed hard, knowing how much this
must be upsetting both her parents. "To be honest with you mum and dad I don't want to eat meat from now on." There
she'd said it at last. She swallowed hard, her mouth dry with
apprehension as her father stopped chewing and lifted his head to look
at her. His gaze made her feel nervous and uncomfortable. She felt
herself fidgeting in her chair. "Is that so?" He said slowly and
deliberately.
"I suppose your mother has told you that I am taking
Michael out with me tonight?" Pam nodded her head. "In fact, he
is very keen to join me, and Ruby has expressed a keen interest
already, although she is a little too young at present, but we're very
proud of both of them, aren't we Mother?" Eva nodded her head in agreement. "And they have done this without any prompting from either your mother or myself." Pam gave a deep sigh and open her hands wide as she began to explain herself. "Oh
dear you just don't understand, do you? What I meant was, it is about
healthier options, eating fruit, veg all the recommendations we're
getting told about for eating five a day." Her father stood up and pored himself a glass of water, he turned back to the table, Pam was almost in tears. "That's
all very well Pam and I hear you, and I do know where you are coming
from but I can't understand why you want to kick out against what comes
naturally to all of us." He sighed "I'll grant you the five a day
that you're referring to, is not the same as the five a day that we're
used to. But it's in your blood girl and you can't do anything about it
now."
He walked over to her chair. "You are trying to change your
future, look at your name Pam, why do you think you willalways have
this struggle on your hands. Today a vegetarian but then like your
name my daughter you are going to find it difficult to maintain a
vegetarian diet."
"My name father, what about my name, you gave it to me?"
"I know that Pam, and if you
haven't realised why you're called Pam Mai and not Pamela by now, well I just don't believe it's possible. Here take this." Her father pushed a piece of paper and a pen over to her. "Now write your name on the paper," Pam picked up the pen and wrote 'Pam Mai Ravie' down. "Now tell me after all these years that you haven't noticed!" "Noticed what?" Pam shouted. "Oh
for goodness sake Pam, it tells the whole world that", her father stopped
and reaching for the pen began to write the letters out ."
His steely gaze fixed on her, as she read what they said,
"Pam Mai Ravie.......
P A M M A I R A V I E
I A M A V A M P I R E
Now do you see, the letters are an anagram
Here we go a couple of little stories before I set Wilma on you, funnily enough both of these stories are about witches and both of them have names that begin with a 'W', very strange. Enjoy and whoever wrote them the kids would like to THANK YOU for letting Diddily borrow them. Diddily says a big Thank You also.
Wanda has a Lesson in Spelling
Wanda the Witch went wandering through a very spooky wood. She loved to practise spooky spells, and the thought of being good made her feel really ill. In fact Wanda took great delight in turning a patch of beautiful bluebells into a pool of slimy, smelly goo. Then she gave a tree such a creepy face that would frighten anyone who happened to pass by. Creeping through the undergrowth, Wanda came upon a wizard, standing gazing into a pond. As quick as lightening she waved her wand and the wizard all but leapt into the water. It wasn't very deep but it was very cold and full of horrible, slimy weeds.
The wizard leapt out in one huge jump, he was so angry with Wanda that he cast a spell as he landed next to her. His big red cloak, moved off his back and wrapped itself around Wanda's body. Then it began to squeeze her really tight.
"Say sorry!" roared the wizard, "or you will stay like that forever!" Poor Wanda she was that shocked to have met someone who was even speedier and nastier than herself that she couldn't stop apologizing to the wizard and not only that, she even made a promise never to be nasty again... Hm,do you think she would keep her word? Who knows we might find another story about Wanda some where else on these pages.
THE WITCH'S BREW
Winnie Witch was having a wonderful time! From her kitchen, deep inside a dark cave, came the sound of bubbling and singing as she stood stirring her huge cauldron. She was singing the spell for a magic monster as she threw the ingredients into the pot.
It had taken her days to collect the long list of stuff from her book of spells. Eye of lizard, toe of frog, tail of rat and bark of dog. The sneeze of a chicken, lick of a weasel and smell of cat, most were easy to get but the cough of the bat had been hard to collect. Winnie had to chase the bat on her broomstick! It whizzed through the night sky so fast that Winnie thought she would fall off her broomstick several times. Eventually the bat must have choked on a fly or something course it coughed and spluttered and Winnie scooped up the cough and put it in her pocket before returning home for a rest. The cauldron began to bubble furiously as Winnie stirred faster and faster. Then just as she thought it would never happen a monsters head began to rise out of the cauldron.
"Ah!" sighed Winnie, "I am very pleased to meet you!" "Mmm!, and I'm very pleased to eat you!" replied the monster.
Winnie went very pale. Surely this wasn't right! She grabbed her wand and frantically shook it at the monster, whispering a spell at the same time. Poor monster, he hadn't even climbed out of the pot, when whoosh, a flick of her wand and bang the monster disappeared. Poor Winnie it took her days and many cup of teas before she calmed down from her awful fright. Poor Winnie I don't think she'll be making Magic Monsters appear again..... Or will she?
If you go to the photo albums you will be able to see a lot of Seligor's and Diddily's family.
Dorothy
Milnes Gilmore, 1956, this was one of the first longish stories I ever
wrote, when I was 12 years old. I thought Wilma when she was changed
looked just like my Grandma.
Wilma's Wishes
Wilma was fed up. She
was fed up with being ugly. She was fed up of traveling everywhere by
broomstick and no one caring whether she got splinters in her bottom or
not. Wilma was fed up. She had somehow managed to change her cat
Tabitha into a weasel and no matter how she tried she couldn't change
her back again, and now every time she tried to pick her up to give her
a cuddle, all she got was bitten or scratched.
Wilma sat at her
table, her breakfast before her, her favourite cold porridge with
plenty of lumps in it and a cup of hot blackberry tea, she sighed
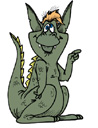
deeply. Only last month she had flown seventeen miles on her broomstick Spike, tovisit the dragons. She desperately needed some dragons ’ blood for one
of her spells. But when she arrived at their cave, there was only one dragon
there, old grandpa Dragonfire who told her that all the young ones
had gone skiing in the alps and they had taken all their spare blood
with them incase of accidents.
Wilma was fed up,
she sighed again, how was a witch supposed to earn any money for food
with no spells to sell and as if that wasn’t bad enough the other day
she decided to go and visit the bats that lived beyond the Petrified
Forest. To begin with she was almost knocked off her broomstick by some
silly Trolls who were playing hoggy in the middle with a live hedgehog.
Poor little hedgehog, he was not at all happy. Then when she finally arrived at the bat cave all she found was a note pinned to the door of their cave, it looked like it had beed written in blood.
It read:
"To whom it may concern We are very sorry about this but we have decided to emmigrate to Africa to stay with our African cousins. We are fed up with this cave it’s so cold in wintertime. We don't really know when, or even if we shall return but we’re afraid there will be no more Bat wings or any more of our spare parts for years, maybe! "
And that was it, Wilma stood looking at the small message for ages,
they hadn’t even said goodbye, or even thanks for all your custom, why
they could have added "We'll bring you back a piece of African rock,
IF we return," at least that would have shown that they were going to
miss her just a little. “It's just not fair” Wilma said again while she added more lumps to her porridge. “It's not right Spike, why can't I be a normal old lady instead of a witch, I am so tired of making spells and potions" Wilma
sat staring into the bowl, she let dollops of porridge drop off the
spoon. It looked really dreadful which was usually how Wilma liked it,
but not this morning. She picked up the spoon and scooped out a big
green dollop of gooseberry jam from the pot, she let it drop into the
porridge and began to stir it round and round. “Oh dear Spike, what am I going to do?” she groaned. Wilma pushed the bowl away. “Oh
come on Wilma, stop feeling sorry for yourself and do something
positive." she moaned as she sat there for a while looking at the
pictures on the walls of her little cottage. "Now that is what I
would do if I had the chance Spike? I would have a lovely cottage like
these pictures, with flowers and herbs growing all around. "What else mistress?" Spike said, brushing up the few crumbs off the parlour floor. "
I really don't know Spike, but I'll tell you what I do know. I'm going
for a nice, long walk in the woods." She got up from the chair, took
off her pinny, collected her walking stick out of the kitchen and was
ready to leave. Spike started to follow her, he really loved going
for a walk with his mistress instead of carrying the old lady
everywhere on his handle, so he was a bit surprised when she picked him
up and put him back in his corner. “No, not today Spike, today you
can stay here and mind the cottage while I'm gone.” Wilma said
more cheerfully as she walked through the door. "oh yes and do try and keep an eye on
Tabitha, we don't want her eating all our food. There's a good broom?” she added, patting Spike on his bristles. Wilma
smiled to herself, she really must try to change poor Tabitha back soon
it can't be very nice being a weasel, especially as she still meowed
like a cat. Wilma closed the door behind her and made her way down the
path and into the woods. She
hadn't gone very far when she came to a sudden stop. There, in the
middle of the path was a Well, you know one of them round things that
have water in them and a bucket and handle over the top. “Now that’s very funny” she said, “I've never noticed this here before, I wonder where it came from?” It
wasn't a very big well, yet it wasn't very small either. But it was a
very pretty well, as though it had not been used for very much, pretty
flowers decorated the sides. Maybe it wasn’t a well for water after all. Wilma leant over the edge and looked inside, oh my, it really was very dark down there. She
bent down and picked up a stone off the path, then leaning back over
the edge she threw the stone into the darkness. Not a sound for ages
then crack, crunch, plop the stone landed with a splash. "HOI, what do you think you're doing up there?” a voice bellowed from somewhere deep within the well. Wilma
jumped back almost hitting her head on the roof over the well.
She was standing her arms over her mouth, her hair she was sure was
standing on end. Then the well spoke again; “Oh that’s nice, that
really is very nice, you tell me if you would like it, if someone came
along and threw half a brick down on your head?” Wilma took a step
towards the well all the colour had drained from her face, “phew, I
don't believe it” she said straining her neck forward to try and see who
was down there, it was probably a grumpy old Genie, who was certain to be
the well's spirit. She crept a little closer then leaning over the edge she whispered. “I'm terribly sorry Mr. er, mm Well, but how was I to know someone was down there.” A
faint light appeared inside the well, Wilma peered over the edge and
into the water below; all she could see was the faint outline of what
looked like a little old man and her own reflection and nothing else at
all. "O my goodness me I thought it was a lady I was talking too,"
the well said with a slight laugh in it's voice, "but now I’m not so
sure, I mean you are a bit strange looking, aren’t you?” Poor Wilma
stood there open-mouthed she didn’t know what to say she just continued
to look into the well. Then when she got herself together she spoke
quite harshly at him. “I really don’t know what to say to that remark, whoever you are, but I do think it’s time you learnt some manners”. Wilma
heard a chuckle coming up through the dim light. “Ok then,” he said, “I
take it you are a witch by the look of you, I’ve heard there are quite
a few in this part of Wales?” “I
wish there were, there is only me left now, well this side of Cefn
Meiriadog. All the others have left and gone to England. The caves are also empty now the bats have gone to Florida or somewhere like that and the dragons have all up and left to go skiing in the Alps. No Point in anyone staying here any more." An
expression of sadness crossed her face; What the well had said was
really hurtful. She knew she wasn't the prettiest witch around but she
wasn't that ugly, more plain and unfussy really. She wiped away the hair that had fallen over her face, a small tear glistened in the corner of her eye. The well spoke again. “Hey if you carry on sitting up there with that sad look upon your face your going to frighten all my customers away.” “What customers, I don’t see anyone else but me and I’m not going to pay for your mucky water?” “Mucky
water, I'll have you know Witchy Babe that this, here water, is magic
water, not just any old muck that you get from the tap.” “Oh yea,
and my Tabitha is still a cat,” Wilma sneered. “You'll be telling me next
that you're a Wishing Well." Wilma began to laugh, she liked the sound
of laughter, she hadn’t laughed for ages. “And what may I ask is wrong with being a Wishing Well? Why its better than being a grumpy old witch and that's for sure.” “Old
witch?” Said Wilma. “I’m not that old and you’d be grumpy if you had
had to go through all the troubles I’ve had these last few weeks. “The
thing is witchy, troubles or no troubles, who these days wants a witch
when they can have wishes instead? Wow that has a rather a nice ring to
it, don't you think?” “That is what I mean,” Wilma said. "Who needs
a witch any more? Almost no one! I was fed up before I left the cottage and now I am
almost past caring. I might as well just throw myself into you and end
it all.” “I wouldn't do that,” declared the well. “I happen to be very fussy about who does and doesn't go swimming about in me.” “Well
what else can I do?” Wilma cried a small tear running down her cheek.
“You said it yourself I'm old and ugly, no one wants my spells any
more. I can't even get the ingredients to make the recipes up any more.
The bats have emigrated to Africa, the dragons are away skiing in the
Alps and I haven’t seen a single newt or slimy toad in weeks and all
the frogs have become princes." She sighed and continued. My cat is a weasel, Spike my broom is that old his handle gives me splinters in my bottom. ” She gave another deep sigh. “So I ask you, what is there left for me to do? ” “You could always have those three wishes I offered,” said the Well. “Just like that, no strings attached like Pinocchio.” Wilma raised her eyebrows and frowned. “Of course there’s a price, there's always a price you don’t get anything for nothing these days” “Don't
I know it, why ten drops of dragons blood now cost almost two
shillings, it has nearly doubled since Christmas. Mind you there are
not as many dragons about now as there used to be either.” Wilma smiled, "yet they can't be short of a few pennies if they can afford to go skiing in the French Alps. ” Wilma cast a thoughtful look down the well. “What’s your price then?" She asked. “How much does three wishes cost.” “Oh
it won't cost you any money.” The well replied. “All you have to do is
tell me what your wishes are and why you want them, and then I decide
if you can have them or not.” Wilma sat and thought for a
moment, as a witch she usually worked her own magic but for some reason
it was difficult to decide now that someone else was offering them to
her. “Hm well I think for my first wish, I would like Tabitha
changed back into a cat again, she does hate being a weasel, and it was
all my fault she a weasel anyway, the spell went a bit wrong, I think
the wind turned the page over." “Then for my second wish," she
stroked her long drooping chin. “Yes for my second wish I would like to
change my old broom Spike into a shiny new vacuum cleaner, one with no
splinters.” “Well
I’m not so sure about this wish," the well said quietly, "I mean what
would you fly around on, you would have to walk every where, and what
about Spike would he want to be vacuum cleaner?” said the well. “Ah
yes I know that,” said Wilma smiling. “But you see for my last wish, if
it wasn’t too difficult, I would like to become an ordinary lady with
lovely curls and gold slippers for my feet, no longer a witch but
someone who has her little cottage in the woods. People would come to
me for their fresh herbs and spices and remedies for their colds and
chill-blains,” she started to dance around as she thought of all the
wonderful things she would like, I could sell the remedies and they
wouldn’t be frightened of me anymore. I could even invite them in for
tea. But then again that is far more than three wishes, it's loads."
She said turning round to face the well again, laughing and smiling
happily. "Yes they would be my three wishes” But the well wasn’t
there, nothing just the path not a trace of it anywhere, vanished into
thin air. Wilma sat on a rock and smiled to herself small tears running
down her face. "It
was all a dream," she said wiping her tears away with her handkie, "I
mean how does a wishing well appear in the middle of a wood out of
nowhere." Slowly she got up from the rock and as she did so,
something glittered on her feet. Gone were her old black pair of boots,
instead she was wearing slippers of golden thread, sparkling in the
suns rays as they shone through the trees. Then she noticed her skirt
and her blouse, Her skirt was a lovely grey like Tabitha and she had a
cardigan of red and a blouse of yellow with little flowers round the
borders. “Oh my goodness,” cried Wilma as she started running back
along the path towards her cottage. She stopped running as she
turned the bend in the path for there sitting on the doorstep of
Wilma's little cottage, purring loudly was Tabitha. She was surrounded
by little gardens full of herbs and flowers. “Its
so pretty, so, so pretty,” she kept saying over and over again as she
walked around admiring all her new plants. Tabitha followed her rubbing
her body along her new skirt, “oh Tabitha it’s so good to have you back
again," Wilma said, bending down and picking her up. Tabitha purred loudly and gave a long meeeooowww as Wilma opened the cottage door. Slowly,
very slowly Wilma walked over to the mirror hanging on the wall at the
bottom of the stairs, she had to feel her way around her furniture for
she had her eyes tight shut. Then holding her breath she slowly opened
them. "Oh my, thank you, thank you, thank you, Mr. Well.” For
there in the mirror stood a beautiful, white haired lady with smiles in
her eyes and dimples in her cheeks, and a chin that was round and
smooth and no longer pointed. Wilma started to cry but then she heard
some one coughing in the corner. “Spike, Spike, you’re still here,
you’re not a vacuum cleaner.” She picked him up and spun him round the
room like they were dancing. “Oh I am so glad it is you I was beginning
to wish I had never wished for you to be changed.” “Shush” said Spike quietly, “never say anything about wishes, you never know what might happen" and with this he gave a quick flick of his bristles and went to put the kettle on in the kitchen. Wilma
just sat there in her chair, reading her book, in her beautiful
cottage, with it's beautiful gardens thinking that she was the happiest
witch, no lady in the whole wide world.
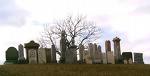
WITCHES Of
course not all used to go well for the so called "Witches" of the past,
they were burnt alive, drowned, locked up, tortured and even branded.
And these weren't tales in books, these were real people who were
blamed as being witches just because their face didn't fit or they were
old, or even had a mark like a mole or blemish on their skin. Here are
a couple of examples taken from recording in an early, very, very
early newspaper.
When King James VI of Scotland and his new bride Anne of Denmark,
along with their entourage, traveled across the North Sea to return to
Scotland in the spring of 1590, they faced a storm. One of the ships
carrying the couple’s wedding gifts capsized. Naturally, the only
reasonable explanation for the loss was witchcraft. The storm was seen
as an assassination attempt and a major witch-hunt ensued. A group of
alleged witches were found and prosecuted. It was believed that the
witches had evoked the storm by throwing cats into the North Sea.
Recorded even earlier than this was when
a hailstorm struck Wiesensteig, Germany in 1562 during the harvest
season, destroying the entire crop, all the usual suspects were rounded
up, and all 62 accused witches were found guilty and executed.
WILMA'S WISHING WELL
Hello! Would you like to look inside Wilma's Magic Well? Hm m I think I shall come and look around with you, if only to remind you that everything that you see in thes shops and on television are not all meant for you and me, if we had them all well what would all the other children in the world have. So I think it would be nice if we just chose two or three things we would really like Wilma to ask Santa to get for us for Christmas or Spike to ask Mum and Dad to get us for our birthdays.
Sweet Dreams my Little Ones, Diddily loves you All. xx
Visit Amazon for all your Games Books and Toys
Why not sit down and have a lovely cup of tea whilst you look around

 Creepy Tales
 He also didn't notice the watchman on duty nearby , with a whistle in his hand and a deep frown on his forehead. When he saw the ghost's footprints, he frowned even more and blew his whistle loudly. The ghost simply smiled at him innocently and walked on. The angry watchman ran after the disobedient ghost. Unfortunately he ran so fast that his braces snapped. This was all to the ghost's delight, for he liked nothing better than a came of "Catch me if you can" so he ran even faster enjoying himself enormousely. The watchman kept blowing his whistle and clutching his pants as he ran after the ghost as fast as he could.


 Who could forget the wicked witch squealing ‘I’ll get you my pretty and your
little dog Toto too,’ with her scary green face, flying on her
broomstick, with a legion of flying monkeys at her command? Does she
have historical roots or is she purely imagination?
Who could forget the wicked witch squealing ‘I’ll get you my pretty and your
little dog Toto too,’ with her scary green face, flying on her
broomstick, with a legion of flying monkeys at her command? Does she
have historical roots or is she purely imagination? 


 names that begin with a 'W', very strange.

 Winnie Witch was having a wonderful time! From her kitchen, deep inside a dark cave, came the sound of bubbling and singing as she stood stirring her huge cauldron. She was singing the spell for a magic monster as she threw the ingredients into the pot.
 The cauldron began to bubble furiously as Winnie stirred faster and faster. Then just as she thought it would never happen a monsters head began to rise out of the cauldron.


 Only last month she had flown seventeen miles on her broomstick Spike, to


 know what might happen" and with this he gave a quick flick of his bristles and went to put the kettle on in the kitchen.